We are optimized for learning, testing, and training. Examples might be simplified to improve reading and basic understanding. Tutorials, references, and examples are constantly reviewed to avoid errors, but we cannot warrant full correctness of all content.
A quick and easy way is to use jQuery and do this:
var $eles = $(":input[name^='q1_']").css("font-color","yellow");
That will grab all elements whose name attribute starts with 'q1_'. To convert the resulting collection of jQuery objects to a DOM collection, do this:
In pure DOM, you could use getElementsByTagName to grab all input elements, and loop through the resulting array. Elements with name starting with 'q1_' get pushed to another array:
var eles =[];var inputs = document.getElementsByTagName("input");for(var i =0; i < inputs.length; i++){if(inputs[i].name.indexOf('q1_')==0){
eles.push(inputs[i]);}}
You can use getElementsByName("input") to get a collection of all the
inputs on the page.  Then loop through the collection, checking the name
 on the way. Something like this:
<!DOCTYPE html><html><head><metacharset=utf-8/><title>JS Bin</title></head><body><inputname="q1_a"type="text"value="1A"/><inputname="q1_b"type="text"value="1B"/><inputname="q1_c"type="text"value="1C"/><inputname="q2_d"type="text"value="2D"/><scripttype="text/javascript">var inputs = document.getElementsByTagName("input");for(x=0;x<=inputs.length;x++){
myname = inputs[x].getAttribute("name");if(myname.indexOf("q1_")==0){
alert(myname);// do more stuff here}}</script></body></html>
var matches =[];var elems = document.getElementsByTagName("*");for(var i=0; i<elems.length; i++){if(elems[i].id.indexOf("log_")==0)
matches.push(elems[i]);}//matches now is an array of all matching elements.
Ok, here's a straight JavaScript answer:
/ a handy function to aid in filtering:// takes an array and a function, returns another array containing// only those elements for which f() returns truefunction filter(a, f){var ret =[];for(var i=0; i<a.length;++i){if( f(a[i]))
ret.push(a[i]);}return ret;}// this collects all elements in the current documentvar elements = document.getElementsByTagName("*");// and this filters out all but those that match our patternvar logElements = filter(elements,function(el){return/log_/.test(el.id)});// simple expression
How do I check if a particular key exists in a Javascript associative array?
If a key doesn't exist and I try to access it, will it return false? Or throw an error?
It will return undefined.
var aa ={hello:"world"};
alert( aa["hello"]);// popup box with "world"
alert( aa["goodbye"]);// popup boc with "undefined"
undefined is a special constant value. So you can say, e.g.
// note the three equal signs so that null won't be equal to undefinedif( aa["goodbye"]===undefined){// do something}
This is probably the best way to check for missing keys. However, as
is pointed out in a comment below, it's theoretically possible that
you'd want to have the actual value be undefined. I've
never needed to do this and can't think of a reason offhand why I'd ever
want to, but just for the sake of completeness, you can use the in operator
// this works even if you have {"goodbye": undefined}if("goodbye"in aa ){// do something}
I hope you have configured your development environment properly with Xcode installed. If you haven’t done so, check out our previous article about what you need to begin iOS programming. We’ll use Xcode 4.3.2 to work on the tutorial. However, you can also Xcode 4.2 to build the app in case you can’t upgrade to the latest version of Xcode.
You may have heard of “Hello World” program if you have read any
programming book before. It has become the traditional program for
first-time learner to create. It’s a very simple program that usually
outputs “Hello, World” on the display of a device. In this tutorial,
let’s follow the programming tradition and create a “Hello World” app
using Xcode. Despite its simplicity, the “Hello World” program serves a
few purposes:
It gives you a better idea about the syntax and structure of Objective C, the programming language of iOS.
It also gives you a basic introduction of the Xcode environment.
You’ll learn how to create a Xcode project and create user interface
with the built-in interface builder.
You’ll learn how to compile a program, build the app and test it using the Simulator.
Lastly, it makes you think programming is not difficult. I don’t want to scare you away.
Take a Look at Your First App
Before we go into the coding part, let’s first take a look at our
version of the “Hello World” app. The final deliverable will look like
this:
Your First iPhone App - Hello World
It’s very simple and shows only a “Hello World” button. When tapped,
the app prompts you a message. That’s it. Nothing complex but it helps
you kick off your iOS programming journey.
Start Coding!
First, launch Xcode. If you’ve installed Xcode via Mac App Store, you
should be able to locate Xcode in the LaunchPad. Just click on the
Xcode icon to start it up.
Once launched, Xcode displays a welcome dialog. From here, choose “Create a new Xcode project” to start a new project:
Xcode - Welcome Dialog
Xcode shows you various project template for selection. For your first app, choose “Single View Application” and click “Next”.
Xcode Project Template Selection
This brings you to another screen to fill in all the necessary options for your project.
Project Options for Hello World App
You can simply fill in the options as follows:
Product Name: HelloWorld – This is the name of your app.
Company Identifier: com.appcoda – It’s
actually the domain name written the other way round. If you have a
domain, you can use your own domain name. Otherwise, you may use mine or
just fill in “edu.self”.
Class Prefix: HelloWorld – Xcode uses the
class prefix to name the class automatically. In future, you may choose
your own prefix or even leave it blank. But for this tutorial, let’s
keep it simple and use “HelloWorld”.
Device Family: iPhone – Just use “iPhone” for this project.
Use Storyboards: [unchecked] – Do not select this option. You do not need Storyboards for this simple project.
Use Automatic Reference Counting: [checked] – By default, this should be enabled. Just leave it as it is.
Include Unit Tests: [unchecked] – Leave this box unchecked. For now, you do not need the unit test class.
Click “Next” to continue. Xcode then asks you where you saves the
“Hello World” project. Pick any folder (e.g. Desktop) on your Mac. You
may notice there is an option for Source Control. Just deselect it.
We’ll discuss about this option in the later tutorials. Click “Create”
to continue.
Pick a Folder to Save Your Project
As you confirm, Xcode automatically creates the “Hello World” project
based on all the options you provided. The screen will look like this:
Main Xcode Window for Hello World Project
Familiarize with Xcode Workspace
Before we move on to code your app, let’s take a few minutes to have a
quick look at the Xcode workspace environment. On the left pane, it’s
the project navigator. You can find all your files under this area.
Project Navigator in Workspace
The center part of the workspace is the editor area. You do all the
editing stuffs (such as edit project setting, class file, user
interface, etc) in this area depending on the type of file selected.
Editor and Utility Area in Xcode
The rightmost pane is the utility area. This area displays the
properties of the file and allows you to access Quick Help. If Xcode
doesn’t show this area, you can select the rightmost view button in the
toolbar to enable it.
Lastly, it’s the toolbar. It provides various functions for you to run your app, switch editor and the view of the workspace.
Toolbar in Workspace
Run Your App for the First Time
Even you haven’t written any code, you can run your app to try out
the Simulator. This gives an idea how you build and test your app in
Xcode. Simply hit the “Run” button in the toolbar.
Run Button in Xcode
Xcode automatically builds the app and runs it in the Simulator. This is how the Simulator looks like:
The Simulator
A gray screen with nothing inside?! That’s normal. As your app is
incomplete, the Simulator just shows a blank screen. To terminate the
app, simply hit the “Stop” button in the toolbar.
Terminate the Running App
Back to Code
Okay, let’s move on and start to add the Hello World button to our
app. Go back to the Project Navigator and select
“HelloWorldViewController.xib”.
Select HelloWorld XIB File
As you select the file, the editor changes to an Interface Builder and displays an empty view of your app like below:
Interface Builder in Xcode
In the lower part of the utility area, it shows the Object library.
From here, you can choose any of the UI Controls, drag-and-drop it into
the view. For the Hello World app, let’s pick the “Round Rect Button”
and drag it into the view. Try to place the button at the center of the
view.
Drag the Round Rect Button to the View
To edit the label of the button, double-click it and name it “Hello World”.
Try to run the app again and you should have an app like this:
Now Hello World with a Button
For now, if you tap the button, it does nothing. We’ll need to add the code for displaying the “Hello, World” message.
Coding the Hello World Button
In the Project Navigator, select the “HelloWorldViewController.h”.
The editor area now displays the source code of the selected file. Add
the following line of code before the “@end” line:
1
-(IBAction)showMessage;
Your code should look like this after editing:
Next, select the “HelloWordViewController.m” and insert the following code before the “@end” line:
// Display the Hello World Message [helloWorldAlert show]; }
After editing, your code should look like below:
Source Code of HelloWorldViewController After Editing
Forget about the meaning of the above Objective-C code. I’ll explain
to you in the next post. For now, just think of “showMessage” as an
action and this action instructs iOS to display a “Hello World” message
on screen.
Connecting Hello World Button with the Action
But here is the question: How can the “Hello World” button know which action to invoke when someone taps on it?
Next up, you’ll need to establish a connection between the “Hello
World” button and the “showMessage” action you’ve just added. Select the
“HelloWorldViewController.xib” file to go back to the Interface
Builder. Press and hold the Control key on your keyboard, click the “Hello World” button and drag to the “File’s Owner”. Your screen should look like this:
Release both buttons and a pop-up shows the “showMessage” action.
Select it to make a connection between the button and “showMessage”
action.
Send Event Pop-up from File's Owner
Test Your App
That’s it! You’re now ready to test your first app. Just hit the
“Run” button. If everything is correct, your app should run properly in
the Simulator.
Hello World App
Congratulation! You’ve built your first iPhone app. It’s a simple app
however, I believe you already have a better idea about Xcode and how
an app is developed.
ADT Plugin 20.0.0 or higher
(if you're using Eclipse)
Welcome to Android application development!
This class teaches you how to build your first Android app. You’ll learn how to create an Android
project and run a debuggable version of the app. You'll also learn some fundamentals of Android app
design, including how to build a simple user interface and handle user input.
Before you start this class, be sure you have your development environment set up. You need
to:
Download the Android SDK.
Install the ADT plugin for Eclipse (if you’ll use the Eclipse IDE).
Download the latest SDK tools and platforms using the SDK Manager.
If you haven't already done these tasks, start by downloading the
Android SDK and following the install steps.
Once you've finished the setup, you're ready to begin this class.
This class uses a tutorial format that incrementally builds a small Android app that teaches
you some fundamental concepts about Android development, so it's important that you follow each
step
An Android project contains all the files that comprise the source code for your Android
app. The Android SDK tools make it easy to start a new Android project with a set of
default project directories and files.
This lesson
shows how to create a new project either using Eclipse (with the ADT plugin) or using the
SDK tools from a command line.
Note: You should already have the Android SDK installed, and if
you're using Eclipse, you should also have the ADT
plugin installed (version 21.0.0 or higher). If you don't have these, follow the guide to Installing the Android SDK before you start this
lesson.
Create a Project with Eclipse
Click New in the toolbar.
In the window that appears, open the Android folder,
select Android Application Project, and click Next.
Figure 1. The New Android App Project wizard in Eclipse.
Fill in the form that appears:
Application Name is the app name that appears to users.
For this project, use "My First App."
Project Name is the name of your project directory and the name visible in Eclipse.
Package Name is the package namespace for your app (following the same
rules as packages in the Java programming language). Your package name
must be unique across all packages installed on the Android system. For this reason, it's generally
best if you use a name that begins with the reverse domain name of your organization or
publisher entity. For this project, you can use something like "com.example.myfirstapp."
However, you cannot publish your app on Google Play using the "com.example" namespace.
Minimum Required SDK is the lowest version of Android that your app supports,
indicated using the API level.
To support as many devices as possible, you should set this to the lowest version available
that allows your app to provide its core feature set. If any feature of your app is possible
only on newer versions of Android and it's not critical to the app's core feature set, you
can enable the feature only when running on the versions that support it (as
discussed in Supporting Different Platform Versions).
Leave this set to the default value for this project.
Target SDK indicates the highest version of Android (also using the
API level) with which you
have tested with your application.
As new versions of Android become available, you should
test your app on the new version and update this value to match the latest API level
in order to take advantage of new platform features.
Compile With is the platform version against which you will compile your app.
By default, this is set to the latest version of Android available in your SDK. (It should
be Android 4.1 or greater; if you don't have such a version available, you must install one
using the SDK Manager).
You can still build your app to
support older versions, but setting the build target to the latest version allows you to
enable new features and optimize your app for a great user experience on the latest
devices.
Theme specifies the Android UI style to apply for your app. You can leave
this alone.
Click Next.
On the next screen to configure the project, leave the default selections and click
Next.
The next screen can help you create a launcher icon for your app.
You can customize an icon in several ways and the tool generates an icon for all
screen densities. Before you publish your app, you should be sure your icon meets
the specifications defined in the Iconography
design guide.
Click Next.
Now you can select an activity template from which to begin building your app.
For this project, select BlankActivity and click Next.
Leave all the details for the activity in their default state and click
Finish.
Your Android project is now set up with some default files and you’re ready to begin
building the app. Continue to the next lesson.
Create a Project with Command Line Tools
If you're not using the Eclipse IDE with the ADT plugin, you can instead create your project
using the SDK tools from a command line:
Change directories into the Android SDK’s tools/ path.
Execute:
android list targets
This prints a list of the available Android platforms that you’ve downloaded for your SDK. Find
the platform against which you want to compile your app. Make a note of the target id. We
recommend that you select the highest version possible. You can still build your app to
support older versions, but setting the build target to the latest version allows you to optimize
your app for the latest devices.
If you don't see any targets listed, you need to
install some using the Android SDK
Manager tool. See Adding Platforms
and Packages.
Replace <target-id> with an id from the list of targets (from the previous step)
and replace
<path-to-workspace> with the location in which you want to save your Android
projects.
Your Android project is now set up with several default configurations and you’re ready to begin
building the app. Continue to the next lesson.
Tip: Add the platform-tools/ as well as the
tools/ directory to your PATH environment variable.
These
tutorials will show you step-by-step how to create many usable
applications for your website. These programs are all fully functional
and ready to use right away on your website. All the code is presented
to you and then explained so you can both use it and understand it.
These do not explain each function in detail like our PHP tutorials do, but rather assume you have some basic PHP knowledge and just need help with the finished product.
How to change your website color based on the day of the week How
to use PHP to change the background color of your website based on the
day of the week. This same concept than be applied to changing any
website variables based on the day of the week.
Calculating Area with PHP How
to create a PHP program to collect the length and width from the user
and then calculate the area of the rectangle. A free PHP Tutorial.
PHP Hex Color Chart This simple PHP script lets you generate a chart of hex (hexadecimal) colors for use in web design
10 Cool Things To Do With PHP So
what can I do with PHP? Here are ten of our favorite fun (and useful)
things you can use PHP for on your website. Looking for more PHP ideas?
Check out our step-by-step section with lots of tutorials on other things you can do with PHP.
Extracting the File Extension How to extract the extension (.jpg), (.gif), (.png), etc from the file name. This is useful if you are renaming the file.
Finding the Document Root Often when installing scripts you need to know the document root. This simple script can give you that information.
Flip a Coin With PHP Use PHP to flip a virtual coin for a yes or no answer. PHP code step by step to show you how to flip a digital coin.
Guess The Number Tutorial This free tutorial teaches you how to write a simple guess the number game in PHP.
Redirect Based on the Day of the Week Redirect
users to a web page based on the day of the week, so you are directed
to one page on a Monday, a different on a Tuesday, and a different on a
Wednesday, etc. using PHP
Redirect Users to Hidden Pages A simple password style redirect that sends a user to the word they enter plus .html as a way of hiding pages
Setting Up A Short URL Forward Sometimes
when you have a really long, unfriendly URL you want something shorter
and easier to remember. We show you how to do this using a PHP
redirect.
Simple Banner Rotation Generate random banners on your site with PHP, or have random graphic rotation.
Simple PHP & MySQL Poll This
tutorial explains how to make a basic poll using PHP and MySQL, along
with the GD Library to give a pie chart of the poll results.
Simple PHP Calendar Learn how to generate a simple PHP calendar using our PHP calendar tutorial - Learn PHP free
What Day of the Week Does it Fall on? This script shows you how to find out what day of the week a specific date falls on by using PHP and the mktime function.
When is Columbus Day? Columbus
Day falls on the second Monday of October every year. So when is it
this year? You can used PHP to determine it's date.
When Is Thanksgiving? How to calculate when Thanksgiving day in the USA falls using a PHP script
You Last Visited PHP Script How to make a PHP script that welcomes the user and tells them when they last visited.
Monthly Calendar This
article shows you how to display a calendar for a given month, mainly
using PHP's date() function. The article talks you through the process
of creating a function which allows you to specify the month and year
for it to output the calendar for the month.
PHP Based Chat Room A step by step tutorial about how to create a PHP based chat room for your site.
Learning a new
language (programming or otherwise) can be a bit overwhelming. Many
people just don't know where to start and give up before they even
begin. Learning PHP is NOT as overwhelming as it might seem, I
promise you. Just take it one step at a time, and before you know it
you'll be off and running.
1.) Basic Knowledge:
The first thing you need, before you start learning PHP, is a basic understanding of HTML. You can switch between PHP and HTML right in the same document. You can even run PHP from an HTML file.
2.) Tools:
When creating PHP pages, you can use the same program you use to create your HTML pages. Any plain text editor will do. You will also need an FTP client
to transfer files from your computer to your web hosting. If you
already have an HTML website you most likely already use an FTP program.
3.) The Basics:
Now you can finally get started learning PHP! The first thing you should read is our PHP Basics
tutorial. This will take you through creating your first file, using
variables, basic math, and basic IF statements (a form of logic).
4.) Learning Loops :
Once
you have mastered these skills, it is time to learn about loops. Loops
repeat the same actions over and over again until a condition is met.
There are several different types of loops which are explained in our Learning Loops tutorial.
5.) PHP Functions:
Finally, you can learn to write your own custom functions. From here the sky is the limit... With a solid knowledge of these PHP basics, adding PHP functions to your arsenal when you need them will be easy.
Now What?:
Where can you go from here? Our step-by-step tutorials show you how to put these PHP skills to use, by making practical scripts for your website.
If you want to show ads between your posts, first go to your Layouts
tab. Then, in the "Blog Posts" section, click on "Edit." A pop-up
window will appear with options to configure your blog posts. Check the
box next to "Show Ads Between Posts." (Note: You must be signed up for AdSense before you can check this box.)
Once you check this box you'll see the configuration options for your
ads. You can then select how often you would like ads to be shown after
your posts.
For example, if you want ads to be displayed after every post, select
"1" from the drop-down menu (please note that AdSense policy limits you
to a total of 3 ad units per page, and Blogger will automatically
prevent you from going over this limit). You can then select your ad
format and colors. Once you have finished configuring your ads, click on
the orange "Save" button.
Blogger provides a simple way for you to make money with your blog. AdSense
is Google's content-targeted advertising program. If you use AdSense,
you don't have to select keywords or categories for your ads. Instead,
Google's servers determine what your posts are about and display the
most relevant ads to your readers. For example, if you blog about
baseball, you might see ads for “Major League Baseball memorabilia” next
to your post. If you blog about painting, you might see ads for “Art
Supplies.”
Blogger requests access to your AdSense account so that we can
automatically create and place ad code on your page through our layouts
and template tools. As a result of this, you might notice that Blogger
is receiving "0%" of your AdSense earnings - this means that you will
receive the same amount for clicks or impressions as you would creating
the ad code from your AdSense account.
To view any partners that have requested access to your AdSense
account, and their associated revenue shares, please log in to your
AdSense account, click the Home tab, choose the Account settings
sub-tab and go to “3rd-party access.” If you see an "enable access"
link next to blogger.com, you must click this link in order to create
ads with Blogger tools.
To take full advantage of other AdSense options and settings, such as managing the types of ads that appear on your blog, you can sign in to the AdSense site and have a look around. That's where you can see how much money your ads are earning and manage your account.
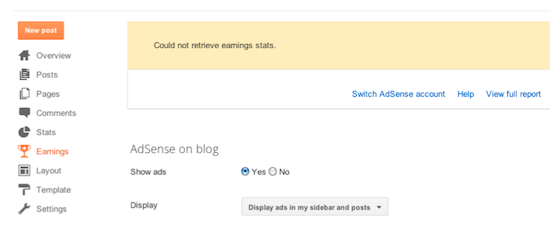
Troubleshooting
Could not retrieve earnings stats
The error message above can occur when 3rd-party Access has been
disabled in your AdSense account. To re-enable access to your AdSense
account by Blogger, please log in to your AdSense account, and click the
Account Settings link. You'll see an enable access
link next to blogger.com, you must click this link in order to create
ads with Blogger tools. You will then be able to log back into
blogger.com and continue setting up AdSense from the Earnings tab.
See also: What's AdSense?
You can incorporate product ads within your blog post by using Google
Affiliate Ads for Blogger. When readers click on an ad (whether it’s
via a text or image link), they’re led to a site to purchase that
product. If your ads generate sales or conversions for participating
advertisers, you may earn commissions and receive payment through your
AdSense account.
How it works
Once you’ve accepted the Google Affiliate Ads for Blogger Terms and Conditions, you’ll see the Advertise Products gadget on the right-hand side underneath Gadgets in the Post Editor.
Let’s say you’re writing about your weekend discovering trails around
your neighborhood, and you want to recommend the running shoes you
wore. Simply type in the product, retailer, or brand name into the
widget, and scroll down the list of products to find the one you like.
Underneath each product, you’ll have the option to insert the ad as a link, image, or full ad.
A link will simply hyperlink selected text in your blog post, while an image will look like this:
and a full ad will look like this, including more information about the product:
You can adjust the size and position the images or ads just like you would a photo within your blog post.
A few tips for promoting products in your blog:
Choose products or brands that are appropriate to the content of your blog and to your audience.
Be honest with your readers.
Be as passionate about the product you’re recommending as you are about your blog.
Embed the Google Affiliate Ad right in your post to make it easy for users to check out your recommendation.
Get started
To start using Google Affiliate Ads for Blogger, you need an AdSense
account. However, this doesn’t mean that you have to display AdSense ads
on your blog. With AdSense and Google Affiliate Ads for Blogger enabled
on your blog, you can choose whether you want to display one, the
other, or both.
Blogs using Google Affiliate Ads for Blogger are matched with
advertisers based on the content that appears on their blogs, so
individual advertisers may not be available to all blogger users. If you
would like to work with Google Affiliate Network advertisers that
aren’t available through Google Affiliate Ads for Blogger, you can sign up as a direct Google Affiliate Network publisher and apply to specific advertiser programs.
I already have an AdSense account
I don’t have an AdSense account
I followed the directions, but I don’t see the Google Affiliate Ads option
Viewing your earnings
To view the income you’ve earned from AdSense or from Google Affiliate Ads for Blogger, just click on the Earnings tab on your blog.
To view details about your earnings, click View dashboard under Google Affiliate Ads. You’ll be led to a Google Affiliate Network page with information about the income you’ve generated.
Other information
Google Affiliate Network reminds you to please comply with laws that
may require your disclosure of any financial benefits you receive for
endorsing specific products or services. To learn more about Google
Affiliate Ads for Blogger, read our Frequently Asked Questions.


 in the toolbar.
 The error message above can occur when 3rd-party Access has been
disabled in your AdSense account. To re-enable access to your AdSense
account by Blogger, please log in to your AdSense account, and click the
Account Settings link. You'll see an enable access
link next to blogger.com, you must click this link in order to create
ads with Blogger tools. You will then be able to log back into
blogger.com and continue setting up AdSense from the Earnings tab.
The error message above can occur when 3rd-party Access has been
disabled in your AdSense account. To re-enable access to your AdSense
account by Blogger, please log in to your AdSense account, and click the
Account Settings link. You'll see an enable access
link next to blogger.com, you must click this link in order to create
ads with Blogger tools. You will then be able to log back into
blogger.com and continue setting up AdSense from the Earnings tab. See also: